
Published Updated VietVisas
How to Photograph Your Documents at Home with a Phone
Photograph documents with your phone, sharp and glare-free: which pages of a passport, green card, ID card or birth record to shoot, plus portrait photo tips.
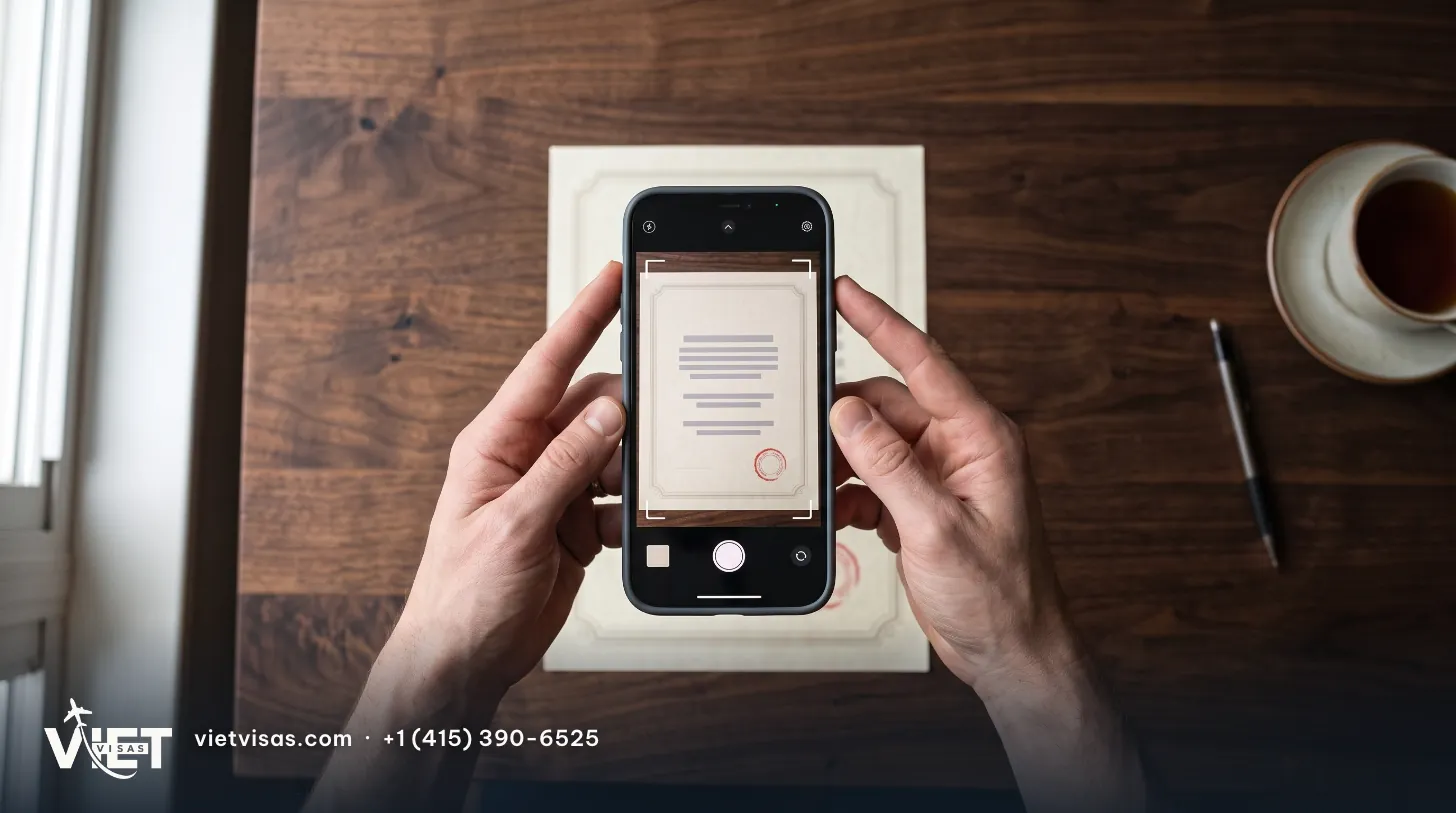
Most Vietnamese paperwork handled from the U.S. starts with a few phone photos of your documents. Clear photos get your file checked quickly; a blurry photo, one with glare, or one with cropped edges has to be retaken, sometimes costing a day or two. The first three sections below are all you need to get it right. The detailed guide further down is there for when a document is hard to photograph.
In short: the 6 things that matter most
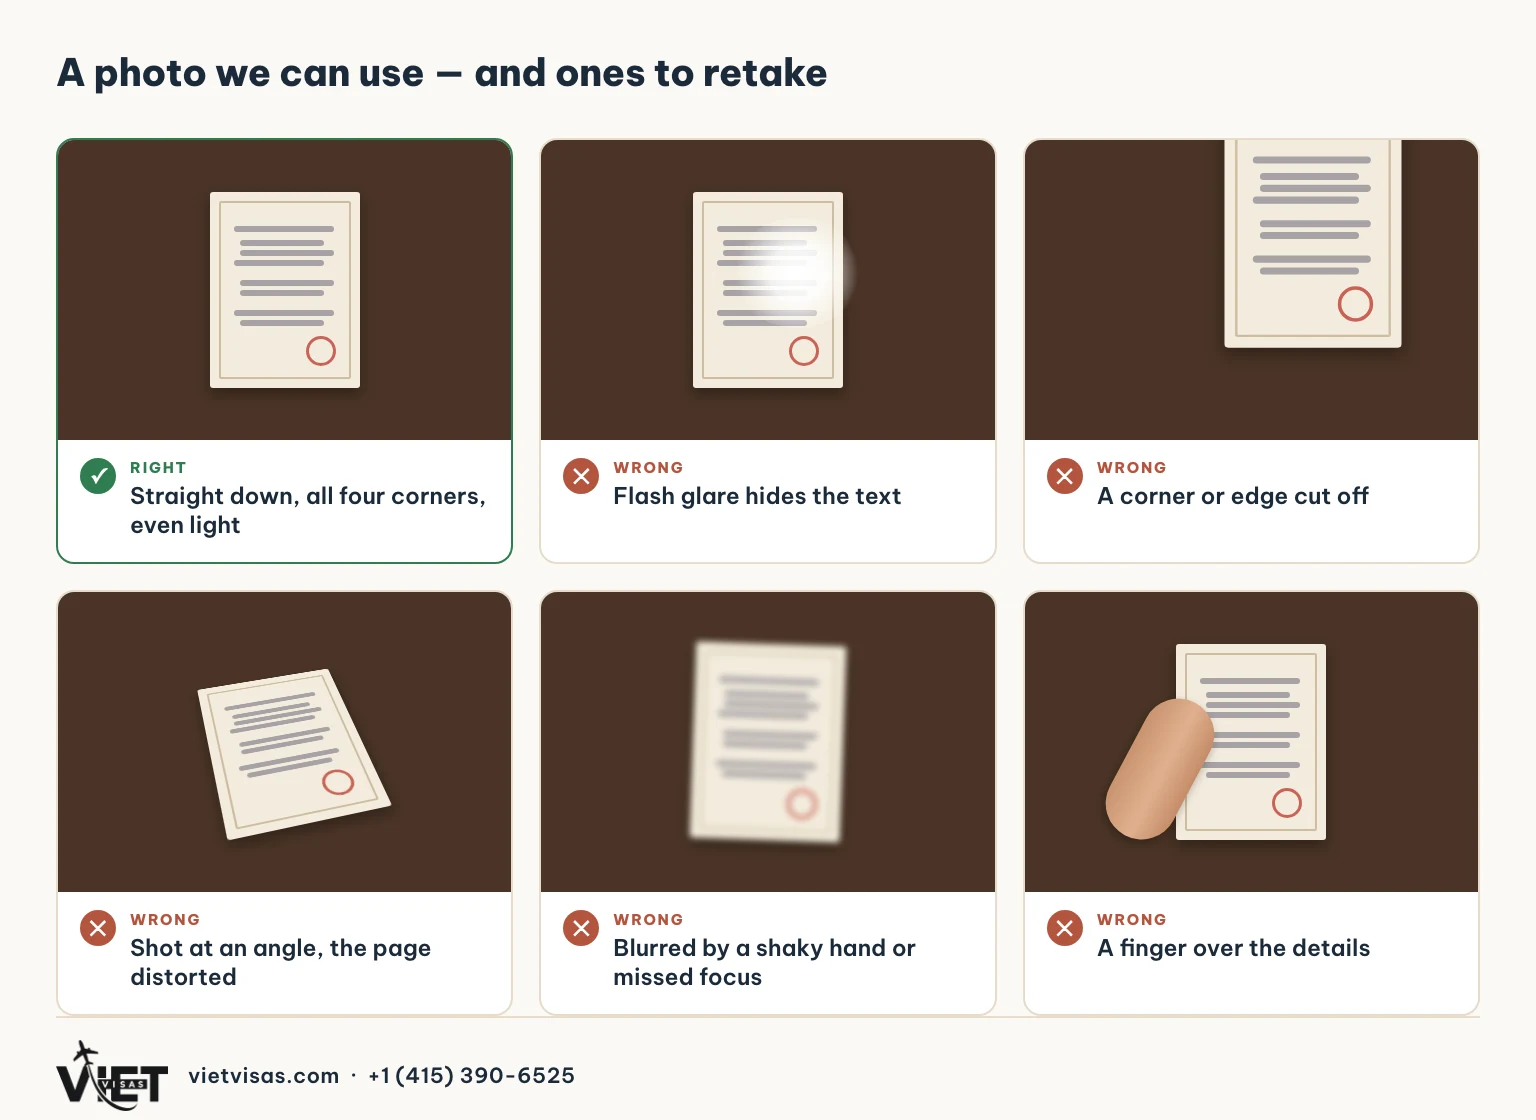
- Use natural light and turn the flash off. Stand near a window in daytime; flash almost always leaves a glare spot.
- Lay the page flat on a dark surface and shoot straight down. Hold the phone parallel to the page.
- Get all four corners. Leave some table showing around the page; don't crop tight.
- No glare, no shadows, no fingers over any text, number or stamp.
- Color photo, no filters, no screenshots. Send the original photo itself.
- Zoom in to check before you send. Only send it if every word and number is readable.
Which pages and sides to photograph
| Document | What to photograph |
|---|---|
| Vietnamese passport | Open it and capture both open pages: the signature page and the information page with your photo. Add any observations or amendment page. |
| U.S. passport | The information page with your photo. |
| Green card | Both sides, one photo per side. |
| Vietnamese ID card (căn cước / CCCD) | Both sides, one photo per side. |
| Driver's license | Both sides. |
| Birth certificate, marriage certificate, divorce decree | The whole page, including stamps and signatures near the edges; add the back if it has text or a stamp. |
| Multi-page documents, land and house certificates | One photo per page, every page, in order. |
| Portrait photo | Facing the camera, face clearly visible; any background — see the next section. |
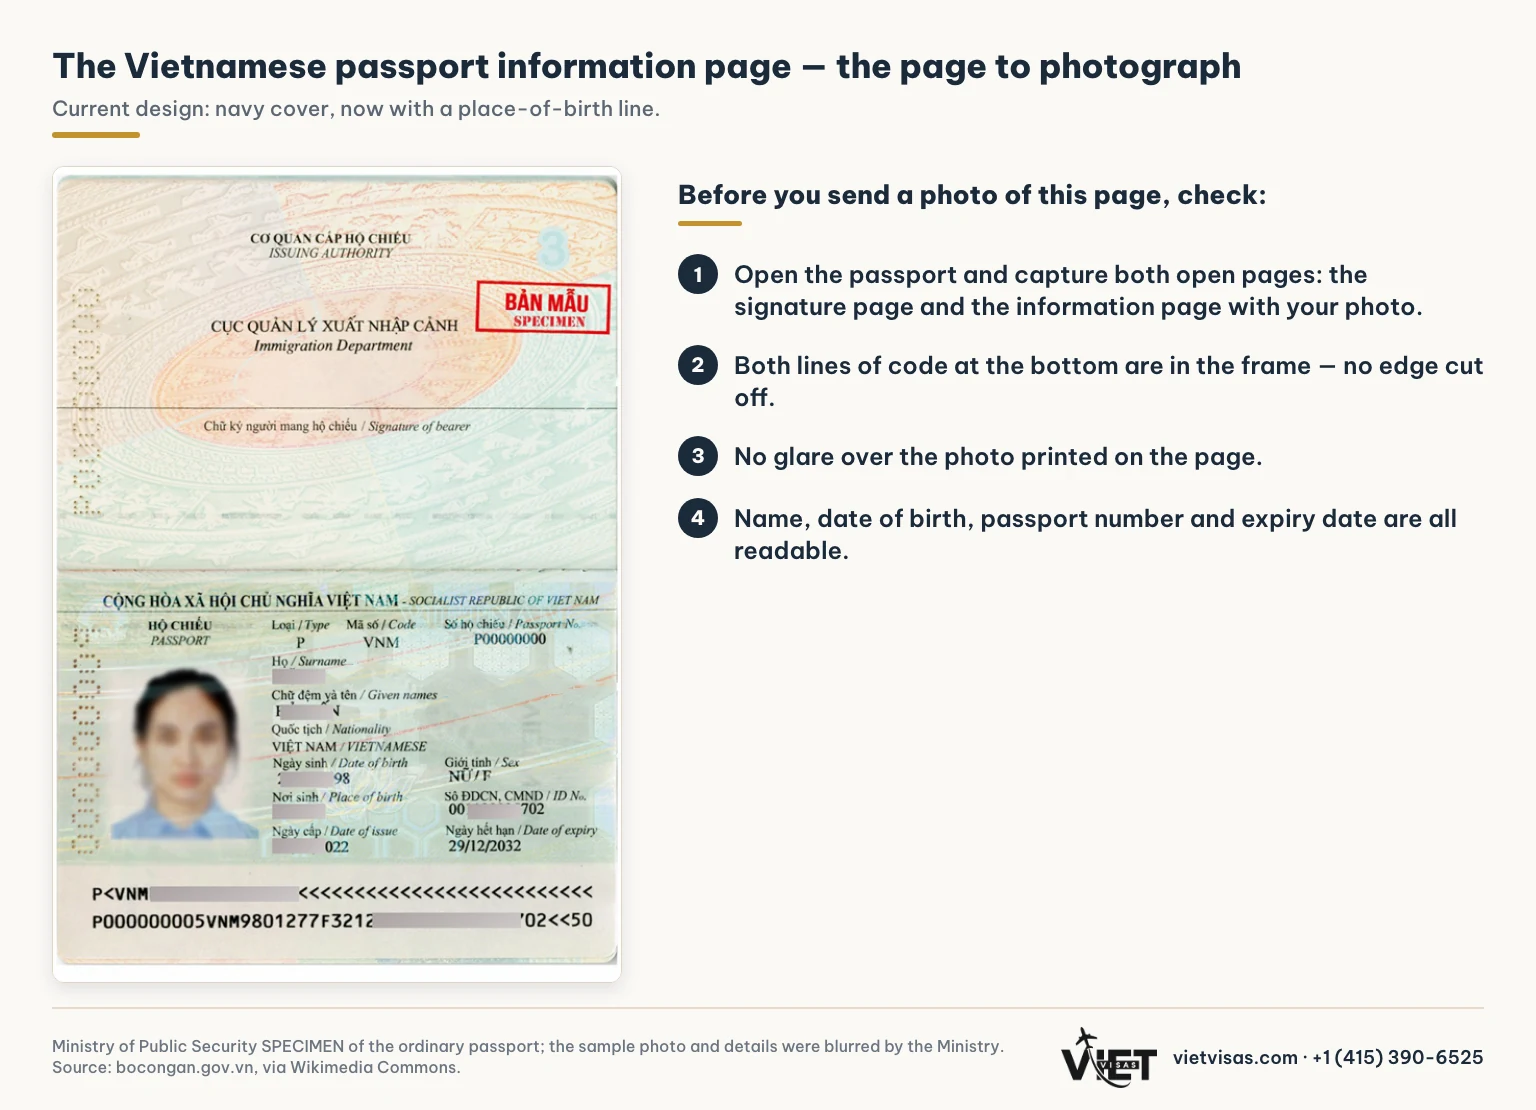
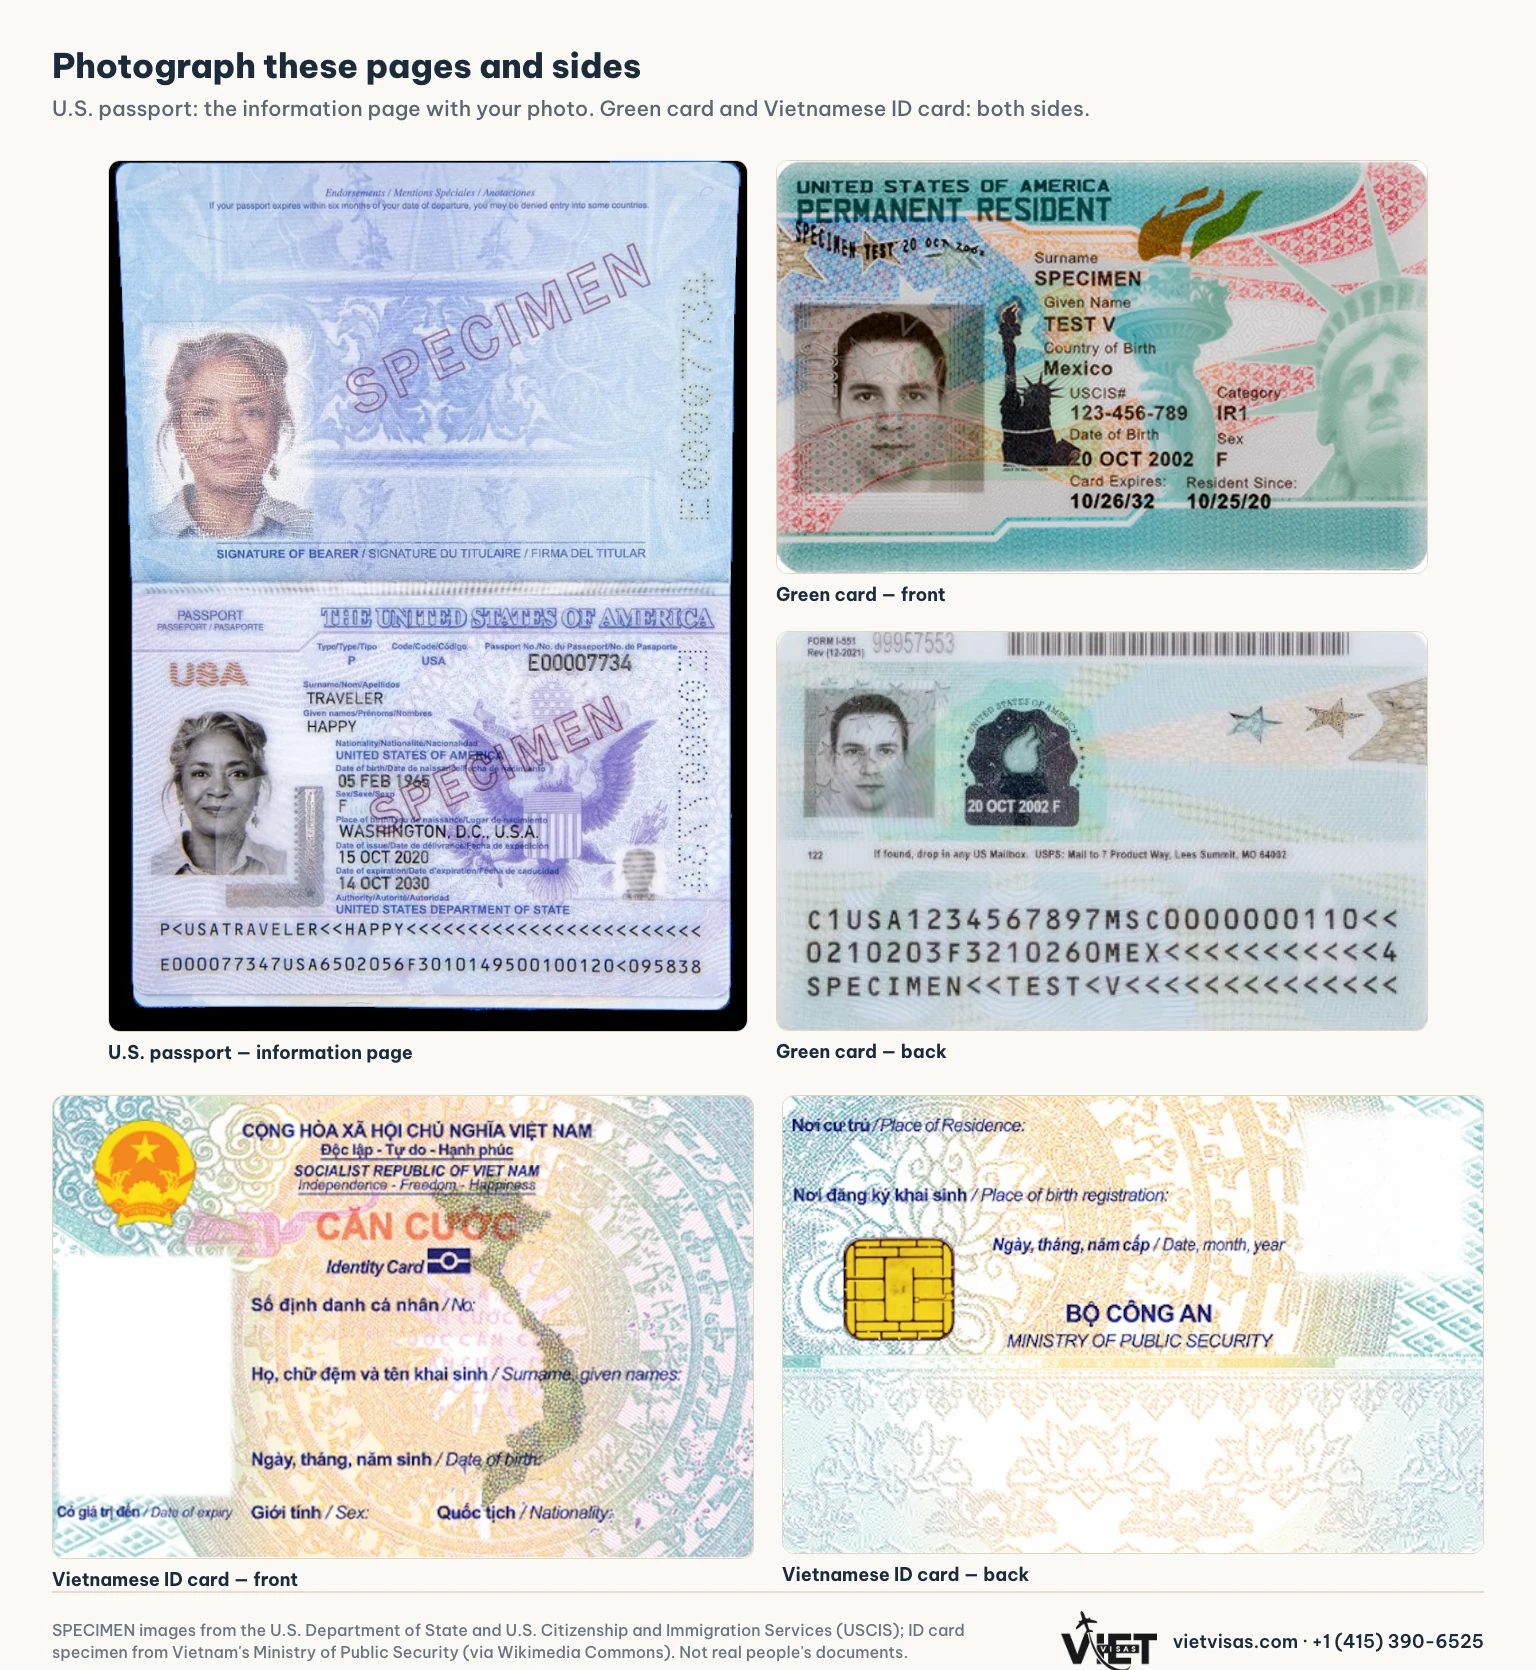
These are official specimen images published by Vietnam's Ministry of Public Security, the U.S. Department of State and U.S. Citizenship and Immigration Services (USCIS), not real people's documents.
Portrait photos: the three basics
Applications such as passport renewal or the 5-year visa exemption need a portrait photo. It's acceptable when all three of these are true:
- Looking straight at the camera, head level, natural expression.
- No glasses, no hat, hair off your face.
- Even light on both sides of your face, no shadows on your face.
The background doesn't need to be white. A plain wall is best, but a colored wall or an ordinary room is fine: if you apply through VietVisas, we crop and fix the background to the required specification.
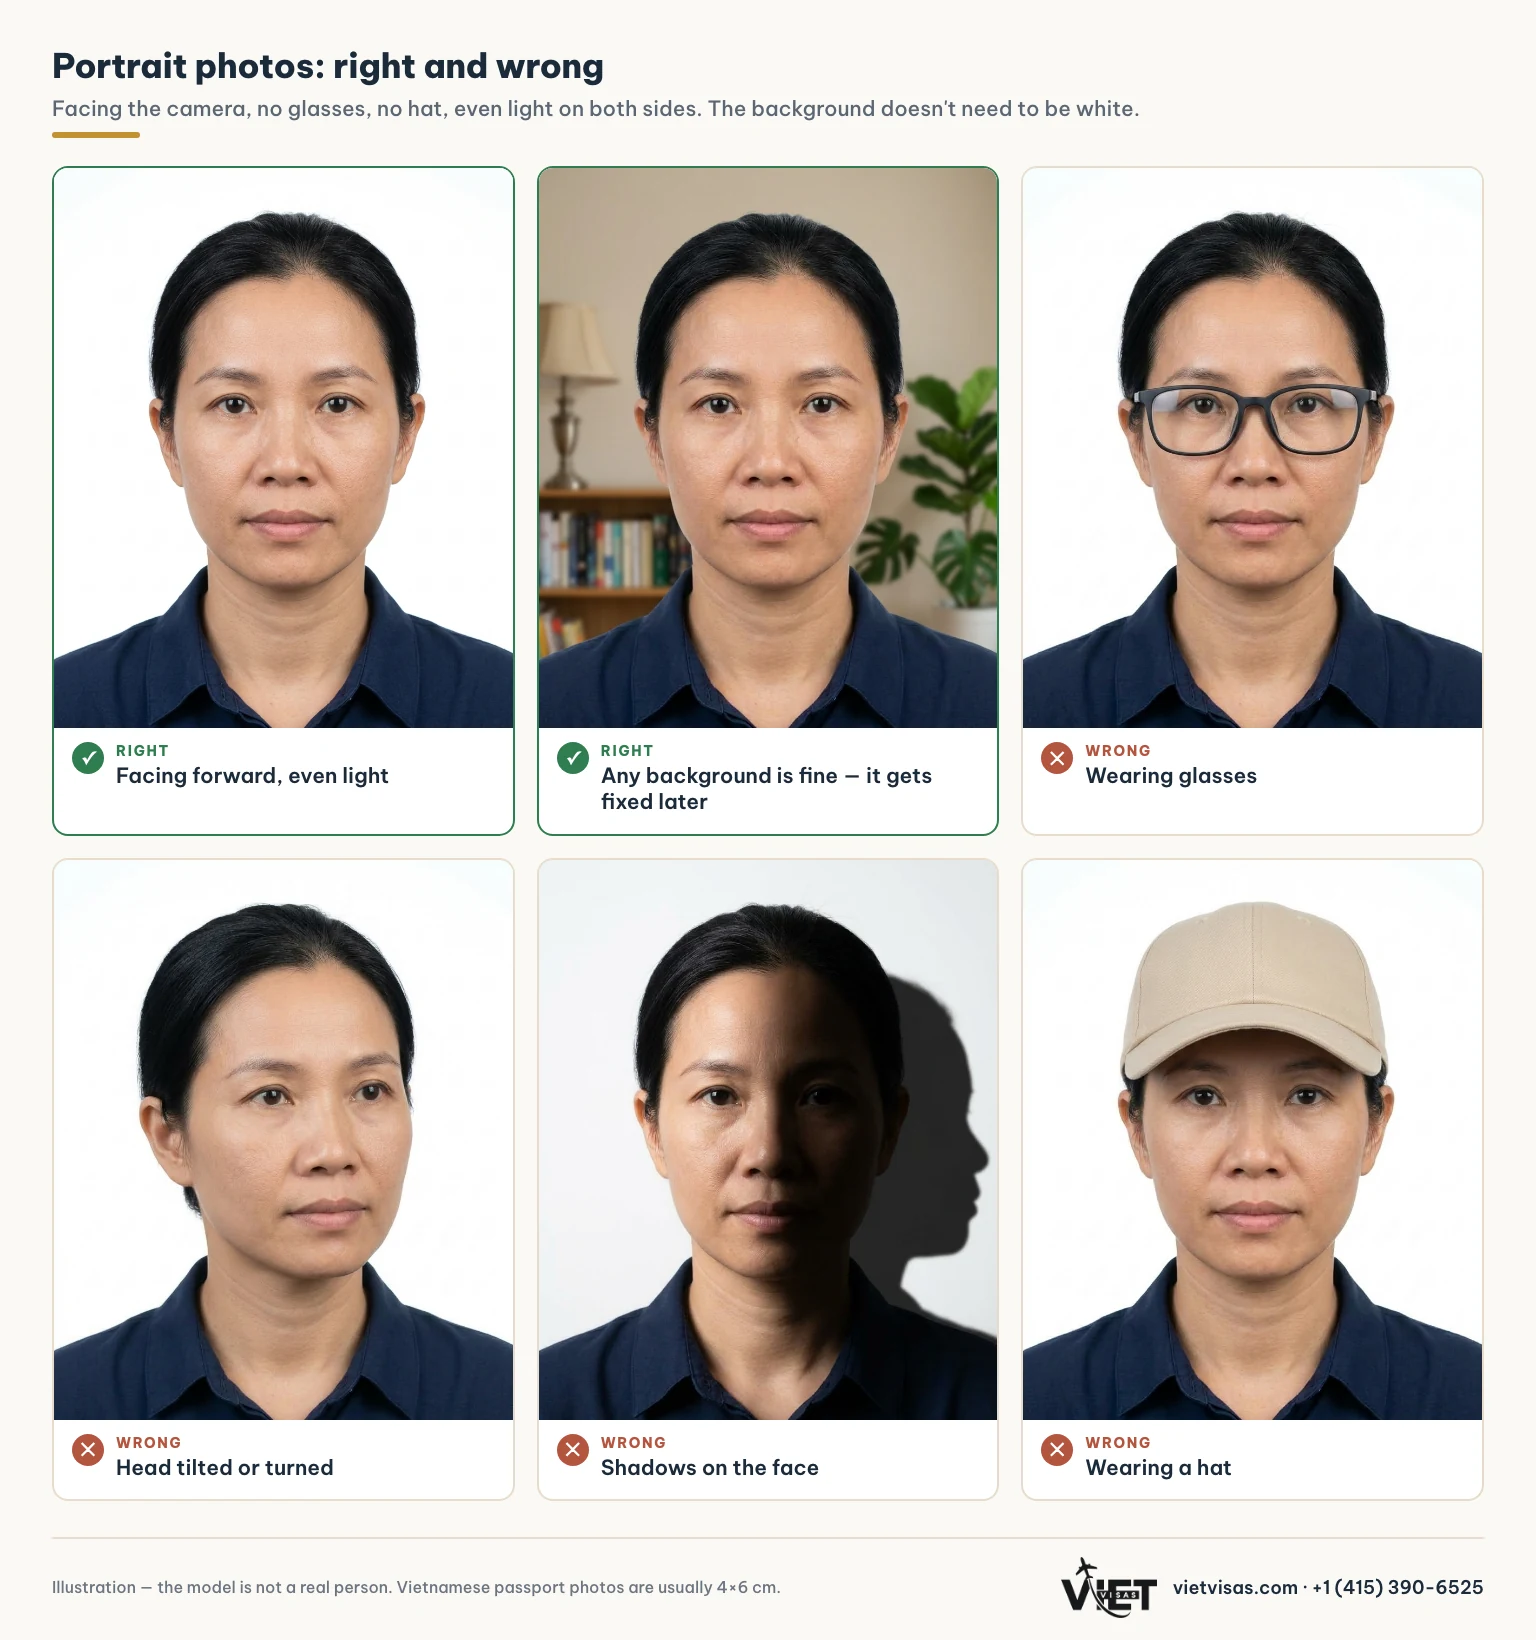
How to take the portrait yourself at home — who takes it, how far away, how to set up the light — is in the detailed guide below.
Sending photos without losing detail
- Send the photo itself, not a screenshot of it.
- Messenger and Zalo may compress photos, blurring small text. On Zalo, send in HD or as a file. If the text is still blurry, send it by email, which keeps full quality.
- Label each photo when sending several documents at once, for example "passport – information page".
- Only send documents through the official channels of whoever is handling your application, never in groups or public comments.
The detailed guide, step by step
This section explains the six points at the top in more depth, for when a photo still isn't coming out right.
Before you start
- Use natural light near a window. Daytime is best. Stand so you don't block the light, or your shadow and the phone's shadow will fall across the page. Warm indoor lighting tints the page yellow and makes red stamps hard to see.
- Turn the flash off. It leaves a glare spot, especially on passports, plastic cards and laminated paper.
- Put the page on a dark, plain surface. A dark wooden table or a sheet of black paper helps the phone find the edges, so nothing gets cropped.
- Take documents out of sleeves and covers. Plastic reflects light and makes the text look blurry.
- Wipe the camera lens. One fingerprint on the lens is enough to blur the whole photo.
Taking the photo
- Lay the page flat. If it has been folded many times, weigh down the edges lightly — never on top of the text.
- Hold the phone parallel to the page and shoot straight down. An angled shot distorts the page into a trapezoid.
- Get all four corners and the border. Leave a little table showing around the page.
- Tap the screen to focus, then hold still for a second before you press the shutter.
- No zoom, no filters, no color adjustments. To make the page bigger in the frame, move the phone closer instead of zooming.
- Zoom in on the photo to check it. Only send it if every word, number, stamp and signature is readable.
Using your phone's built-in document scanner
For a clean, scanner-like result you don't need to install anything:
- iPhone: open Notes, start a new note, tap the camera or paperclip icon and choose Scan Documents. It finds the page edges, straightens the page and saves a PDF.
- Android: open Google Drive, tap + and choose Scan.
For a document with several pages, scan them in one go so they are saved as a single PDF in page order.
Detailed tips for each type of document
Vietnamese passport
- Open the passport and hold the outer edge lightly so both pages lie flat, then capture both open pages in full. If the pages spring up, the spine casts a shadow down the middle.
- The information page has a glossy protective layer, and glare shows up most over the photo. If you see a bright spot, change where you stand relative to the window.
- An expired passport is photographed the same way.
- If the passport has an observations, amendment or extension page, photograph that page too.
- You usually don't need the outside cover; you'll be told if your application does.
U.S. passport, green card, driver's license
- U.S. passport: photograph the information page with your photo, including both lines of code at the bottom.
- Green card and driver's license: photograph both sides, one photo per side. The back of a green card has three lines of code — all three must be in the frame.
- Plastic cards carry holograms and glare easily. If you see a bright spot, turn slightly until it disappears, then shoot straight down.
Vietnamese ID card (căn cước and CCCD)
- Photograph both sides. The front has your photo and name; the back has the issue date, the chip and the remaining details.
- A citizen identity card (CCCD) issued before July 2024 and the new căn cước card are photographed the same way. An older card that hasn't expired is still valid; photograph the card you have.
- If all you have is an old chứng minh nhân dân (CMND), photograph both sides and send it anyway.
- Don't cover the QR code or the chip with a finger — lay the card on the table before you shoot.
Birth certificate, marriage certificate, divorce decree
- Photograph the whole page, including stamps, signatures and registration numbers near the edges.
- If the back has text, a stamp or a certification, photograph the back too.
- U.S. documents often carry a raised (embossed) seal with no ink, which barely shows in a photo. Shoot where the light falls across the page from one side, and the seal stands out.
- Oversized extracts or long pages: step back to fit the whole page, then zoom in to check the small print is still readable. If it isn't, add a photo of each half.
Multi-page documents and property papers
- One photo per page, every page, in order — including pages that only carry a signature or a stamp.
- For Vietnamese land and house certificates (sổ đỏ, sổ hồng), photograph the pages recording changes at the back, not only the first page.
- Long judgments and decisions are easiest to send as a single PDF.
Taking your own portrait photo at home
- Have someone else take it from about 1–1.5 meters (3–5 feet) away. Don't use the front camera: at close range it distorts your face.
- Face a window, standing about half a meter (a foot and a half) in front of the wall so your shadow doesn't land on it.
- Wear clothing that contrasts with the wall behind you, so the background is easy to separate and fix.
- Natural expression, mouth closed, both eyes open, looking straight into the lens.
- No beauty filters and no editing.
- For a baby: lay the baby on a plain, light-colored sheet and shoot from above while their eyes are open.
Vietnamese passport photos are usually 4×6 cm. Just send the original photo from your phone; if your application needs a different size or a printed photo, you'll be told in advance.
Frequently asked questions
Do I need a scanner? No. A recent phone takes sharp enough photos if you follow the six points at the top. A scan from a scanner is of course fine too.
Are black-and-white photos okay? Send color photos. Color preserves red stamps, blue-ink signatures and details that black and white loses.
Can I send a screenshot? Best not. Screenshots are often lower resolution and can cut off the edges. Send the photo from your photo library instead.
Do I have to send my original documents? Photos are usually enough to review your file first. Some procedures include a step that needs an original or a certified copy; if you work with VietVisas, you'll be told clearly before you have to send any document.
What if a document is old, torn or faded? Photograph it as clearly as you can and send it anyway. Whoever reviews your file will tell you whether it can still be used or you need a new copy.
Not sure your photos are good enough? Send them to VietVisas on Messenger — we'll take a look and tell you if anything needs retaking.